Perfectly Juicy Air Fryer Chicken Breast Recipe
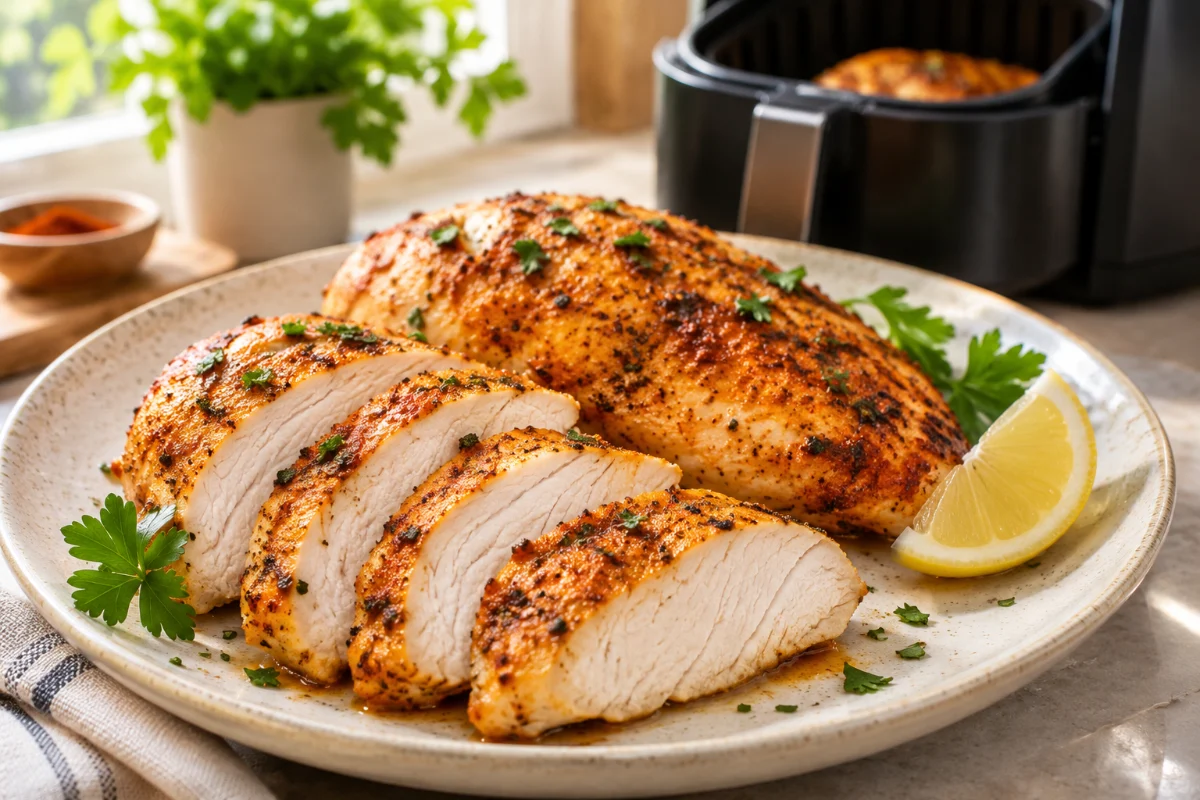
Are you tired of biting into dry, rubbery chicken? I certainly was. For years, I struggled to meal prep chicken breasts that actually tasted good by Wednesday. Between balancing a busy work schedule and trying to maintain a healthy lifestyle, I needed a reliable protein source that didn't feel like a chore to eat. That is when I decided to truly master the air fryer chicken breast. Today, I want to share my personal, fail-proof method to ensure your chicken stays incredibly juicy on the inside, with a perfectly seasoned exterior. Let's transform your weeknight dinners and meal prep sessions together.
Why the Air Fryer Changes Everything
If you are anything like me, you probably bought an air fryer thinking it would just be a healthier way to make french fries. But over the past few years, it has become my most trusted kitchen appliance for proteins. The beauty of the air fryer lies in its rapid air circulation. Unlike a traditional oven that slowly bakes the moisture out of lean meats, the air fryer cooks the chicken quickly from all angles. This rapid cooking process creates a slight seal on the outside of the breast, locking in the natural juices before they have a chance to evaporate. It is a genuine game changer for anyone who wants healthy, high-protein meals without sacrificing flavor or texture.
The Secret to Tenderness: Preparation Matters
Before we even turn on the appliance, we need to talk about preparation. You cannot just throw a cold, uneven piece of meat into the basket and expect magic. First, take your chicken breasts out of the refrigerator about fifteen minutes before cooking. Letting them come slightly closer to room temperature prevents the muscle fibers from shocking and seizing up in the heat, which is a common culprit for tough meat.
Second, we need to address the thickness. Chicken breasts are naturally thicker at one end. If you cook them as-is, the thin end will dry out before the thick end is fully cooked. I highly recommend placing the chicken between two pieces of parchment paper and gently pounding the thicker end with a rolling pin or meat mallet until the whole breast is an even thickness. It takes two extra minutes, but it is the ultimate secret to an evenly cooked, tender result.
My Go-To Everyday Spice Blend
A great recipe needs flavor, and because we are cooking this quickly, a dry rub is the best way to go. I always coat my chicken in a light layer of extra virgin olive oil first. The oil helps the spices adhere and encourages that beautiful golden crust. Here is the spice blend I keep in a little jar on my counter because I use it so often:
- Paprika: Adds a wonderful color and a subtle sweet smokiness.
- Garlic Powder: Essential for savory depth.
- Onion Powder: Complements the garlic beautifully.
- Salt and Black Pepper: Be generous with the salt; it tenderizes the meat as it cooks.
- A pinch of dried oregano: For an earthy, herbal note.
Feel free to experiment, but this simple combination works perfectly for salads, wraps, or just eating on its own alongside some roasted vegetables.
Step-by-Step Cooking Instructions
Now for the main event. Getting the temperature and timing right is crucial. Every air fryer is slightly different, but after dozens of tests in my own kitchen, I have found the sweet spot.
- Preheat the appliance: Set your air fryer to 375°F (190°C) and let it run empty for about three to five minutes. A hot basket jump-starts the cooking process.
- Arrange the chicken: Place the seasoned chicken breasts in the basket in a single layer. Do not overcrowd them. The air needs space to circulate around each piece. If you are cooking for a family, you might need to do this in two batches.
- Cook for 10-12 minutes: At the halfway mark (about 5-6 minutes in), open the basket and carefully flip the chicken breasts using tongs. This ensures both sides get that gorgeous, appetizing color.
- Check the internal temperature: This is the most important step for food safety and quality. Remove the chicken when a meat thermometer inserted into the thickest part reads 165°F (74°C). If you do not own a meat thermometer, I highly encourage you to invest in one; it takes all the guesswork out of cooking meat.
The Golden Rule: Let It Rest
I know how tempting it is to slice right into that hot, aromatic chicken the second it comes out of the basket. Please, resist the urge! If you cut into it immediately, all those delicious juices will run straight out onto your cutting board, leaving you with the dry chicken we are trying to avoid.
Transfer the cooked chicken to a clean plate or cutting board and loosely tent it with a piece of aluminum foil. Let it rest for at least five full minutes. During this time, the muscle fibers relax and reabsorb the juices, distributing moisture evenly throughout the breast. This single step is the difference between a good dinner and a great one.
Empowering Your Weekly Routine
Once you master this simple technique, you will realize how much time and stress it saves. I like to cook a batch of these on Sunday afternoons. Once they have completely cooled, I slice them and store them in an airtight glass container in the fridge. They stay fresh and delicious for up to four days, making it incredibly easy to assemble a healthy lunch or a quick dinner after a long day of work.
Remember, building healthy habits doesn't have to be complicated. Sometimes, all it takes is learning one solid technique that you can rely on week after week. I hope this recipe brings a little more ease and a lot more flavor into your busy life. Happy cooking!